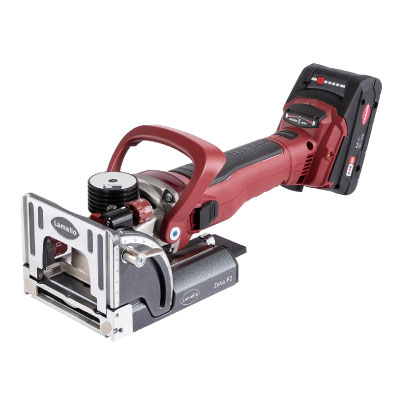
How to use Lamello Zeta P2 with a CNC router
Lamello On The Road with Innovative Integration of Lunenburg, MA
Video Transcript:
Hey guys, how’s it going? Dan Dempsey with Lamello USA. Today we’re with Josh from Innovative Integrations. He’s showing us a really cool cash wrap project he recently completed with the Lamello Flexus. It’s our newest Clamex connector. He’s going to walk us through what he did and why he did it, and we’re going to put a couple of these pieces together for you to see.
All right, Josh, so I see you got the P-10 connector in here as well—the typical piece of some slot—but you also have these two outside five-millimeter holes. You want to tell us what those are for?
Uh, so these are location pins, basically. This allows me to position all these exactly where I want it to match the mating piece.
And so you cut these on your CNC, right?
Correct, yep. I use an eighth-inch bit to cut these. This obviously isn’t here, but then when I go to route the P-10, these pins fit perfectly in the hole. Look at that.
And you just plunge and go, and work your way down. So as opposed to measuring all this out by hand and having to cut these by hand, you’re able to drill your location holes where your slot needs to be. These two five-millimeter holes are 101 millimeters apart from each other, which is the exact offset of these two—where typically your rubber grips are on the base plate of your Zeta. So what we did here, those rubber grips pop out, the pins go right on in.
He cuts these on a CNC and is able to just make his slots centered on those pins. Saves a lot of time.
Definitely a ton of time.
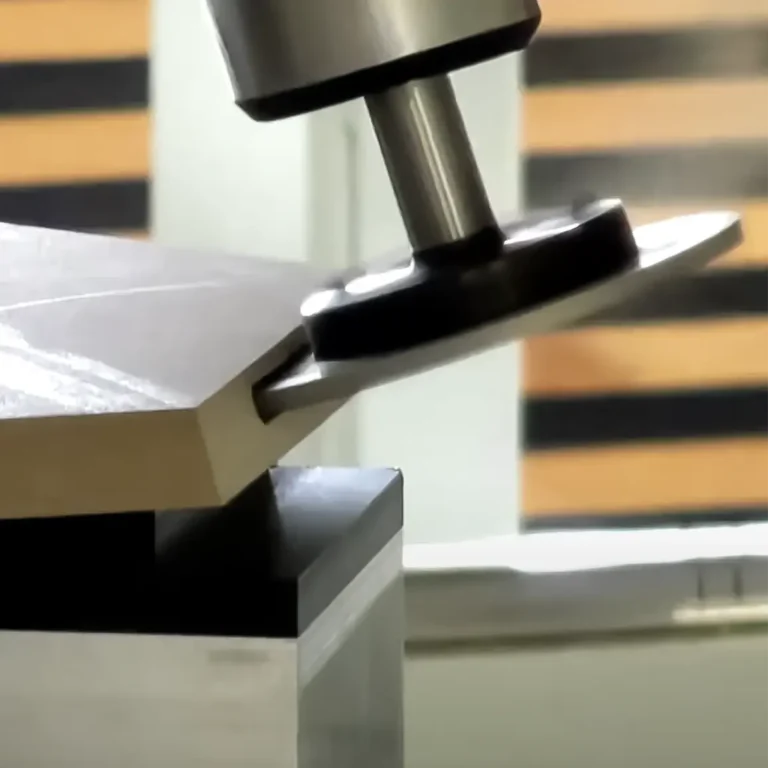
All right, so earlier we were showing you guys how Josh used the positioning pins right here to make holes, make the slots on the face of his material. We also have a second attachment here. This is called our positioning tab. And so this is for making the slot on the edge of your material.
For this application, what Josh is seeing—see all he has to do—is drill one single six-millimeter hole about 7.5 millimeters off the edge of his material. He attaches his stop square now to the Zeta machine. You can see this little red tab sticking out. Drop this tab into that hole the CNC made for me, and now I can plunge in and make my slot, and it’s going to be centered right on this hole.
Best part about this system is when I go and slide in my Clamex connector, that’s my access hole to turn the cam lock right there.
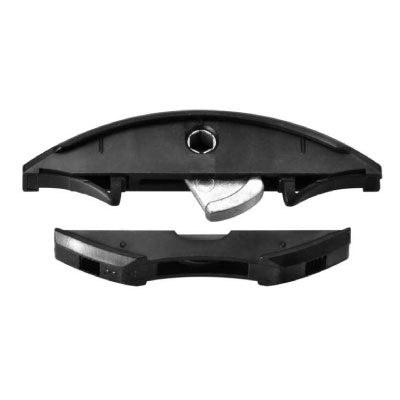
All right, guys, so real quickly, just wanted to kind of explain to you why Josh chose the Flexus connector over our standard Clamex P-14.
Now, there’s a little mock-up right here. So as you can imagine, as he’s putting his fin on the piece here, he’s got to make slots on all three sides of the kiosk. These Clamex connectors have these fixed tabs here, which are great for when you’re indexing your two pieces. It also allows for a little bit of lateral adjustment. As you can see, they fit into these slots on the female side, but the tabs are a little bit smaller than the slots themselves, so that gives you the lateral adjustment of the Clamex.
However, in this application, if he’s sliding a fin onto all three sides, these tabs are going to get in the way. So what he used was the Flexus connector. Those tabs are actually spring-loaded now, so what he can do is slide his piece on, and those will decompress, and then slide his fin into the mating slots.
All right, Josh, tell me about this project a little bit. How did this kind of come to your door? How did that go in your shop, and what kind of planning went into it to make this happen?
So we got—which is rare, but we like—we actually got a drawing, a 3D model, and then a drawing of this. But obviously, that isn’t real, and we had to figure out how to make this real from the drawing.
So the design was—the look of it was done for us. But we had to make it reality. So figuring out how to make everything attach together and whatever was sort of our job—figuring out what materials to use, etc.
And one thing you had mentioned before to me earlier was that with all these fins attached—and you guys can see how many of these are going on—not only does it become a much larger unit assembled, but it also becomes much heavier.
Yes.
So the ability to bring just the box in and then attach the fins at the drop site was a good thing for you.