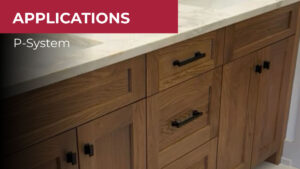
False Drawer Fronts with Tenso P-14
Set Zeta P2 to the 14mm depth setting for Tenso P-14 connectors on the back side of the drawer face Use stop square to create an outside reference fence Run 14mm deep P-System slots on back of drawer face Insert male Tenso P-14 halves into back side of drawer face Set Zeta P2 to the…
Read More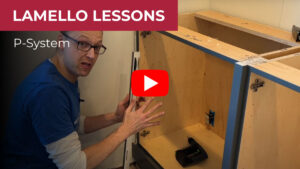
How To Install Cabinet Face Frames, Filler Strips and Scribes with the Lamello P System
Hey, I’m Keith from Keith Johnson Custom Woodworking, and today we’re on-site doing an installation of a 15-foot built-in. We’ve got painted cabinets below, rift sawn white oak cabinets going above. We have the first run of cabinets in, but we need to scribe our filler strips. Now, this is all pre-finished material, so using…
Read More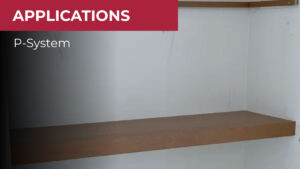
Floating Shelves with P-System
How it works: Establish control line for front edge; then scribe left, right and back edges of shelf Transfer scribe lines to shelf components Lay out center lines for connector slots Machine slots, referencing finished side with stop square Install Tenso female halves into shelf top and bottom edges Install Tenso male halves in fascia…
Read More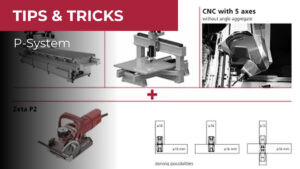
Great combination of CNC machines and Zeta P2 and Zeta P2 Cordless
How it works: P-System Groove in Surface Position of drill holes, ø 5 mm / ø 8 mm Drill positioning holes with a CNC, ø 5 mm / ø 8 mm Insert the positioning pins into the Zeta P2 Position the machine in the holes How it works: P-System Groove in Edge Drill positioning holes…
Read More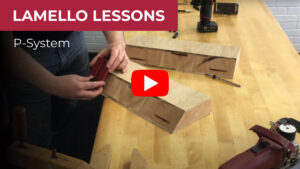
How to Build a Waterfall Edge Table
Transcript:This is Chris from Lamello. In this video, we’re gonna show you how to clamp waterfall countertop edges or thick mitered material. We’ve shown you in other videos how you can clamp together a three-quarter material—it’s very easy, it’s a one-step process. Here, we don’t want to make one line of connectors across the middle…
Read More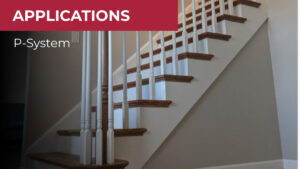
Beveled Riser-to-Stringer Assembly with Tenso P-14
How it works: Make P-Systems lots in stringer and risers using stop square Install Tenso female connectors on beveled edge of risers Install Tenso male connectors in beveled edge of stringer Glue beveled edges of finished stair parts and apply adhesive to backside of riser Assemble riser to stringer Crisp seams with no visible fasteners
Read More
Removable Pocket Door Jambs With Clamex S-20
How it works: Back-bevel the long jamb leg Layout and match connector slots on edge of jamb leg and back side of casing Determine slot position in jamb and casing Set biscuit joiner to “20” and use spacer plates or stop square to achieve desired slot height Machine #20 slots in jamb and casing Drill…
Read More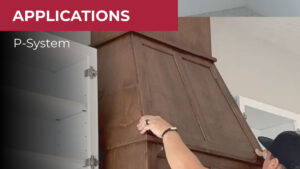
Range Hoods with P-System
How it works: Lay out and machine P-System slots for top edge of front panel Transfer marks from front access panel to upper unit Transfer center line of slots to upper unit Machine P-System slots in upper unit Lay out location for Clamex P-14 slots Machine slots in edge of hood frame uprights Machine slots…
Read More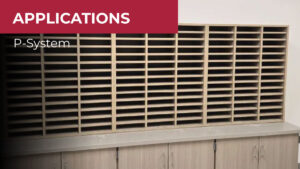
Mail Room Cubbies with P-System
How it works: Drill 8mm holes for male halves into uprights with CNC router (or handheld jig) Pre-assemble cabinet units Machine the running slots on shelf edges with wing cutter on router/shaper table. Use stop blocks on fence to keep slots blind within shelf edges. Set Zeta P2 or Zeta P2 Cordless to “18” depth…
Read More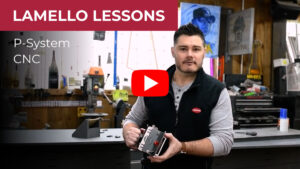
How to use Lamello Zeta P2 with a CNC router
Video Transcript: Hey guys, how’s it going? Dan Dempsey with Lamello USA. Today we’re with Josh from Innovative Integrations. He’s showing us a really cool cash wrap project he recently completed with the Lamello Flexus. It’s our newest Clamex connector. He’s going to walk us through what he did and why he did it, and…
Read More
Face Frame Cabinets with P-System
How it works: Lay out connector slot location on the back side of face frames Set the stop square on Zeta P2 to the appropriate height Set the top adjustment knob to the correct setting Cut slots on the face frame Cut corresponding slots on cabinet boxes Install connectors Install pre-load clip Apply glue (when…
Read More